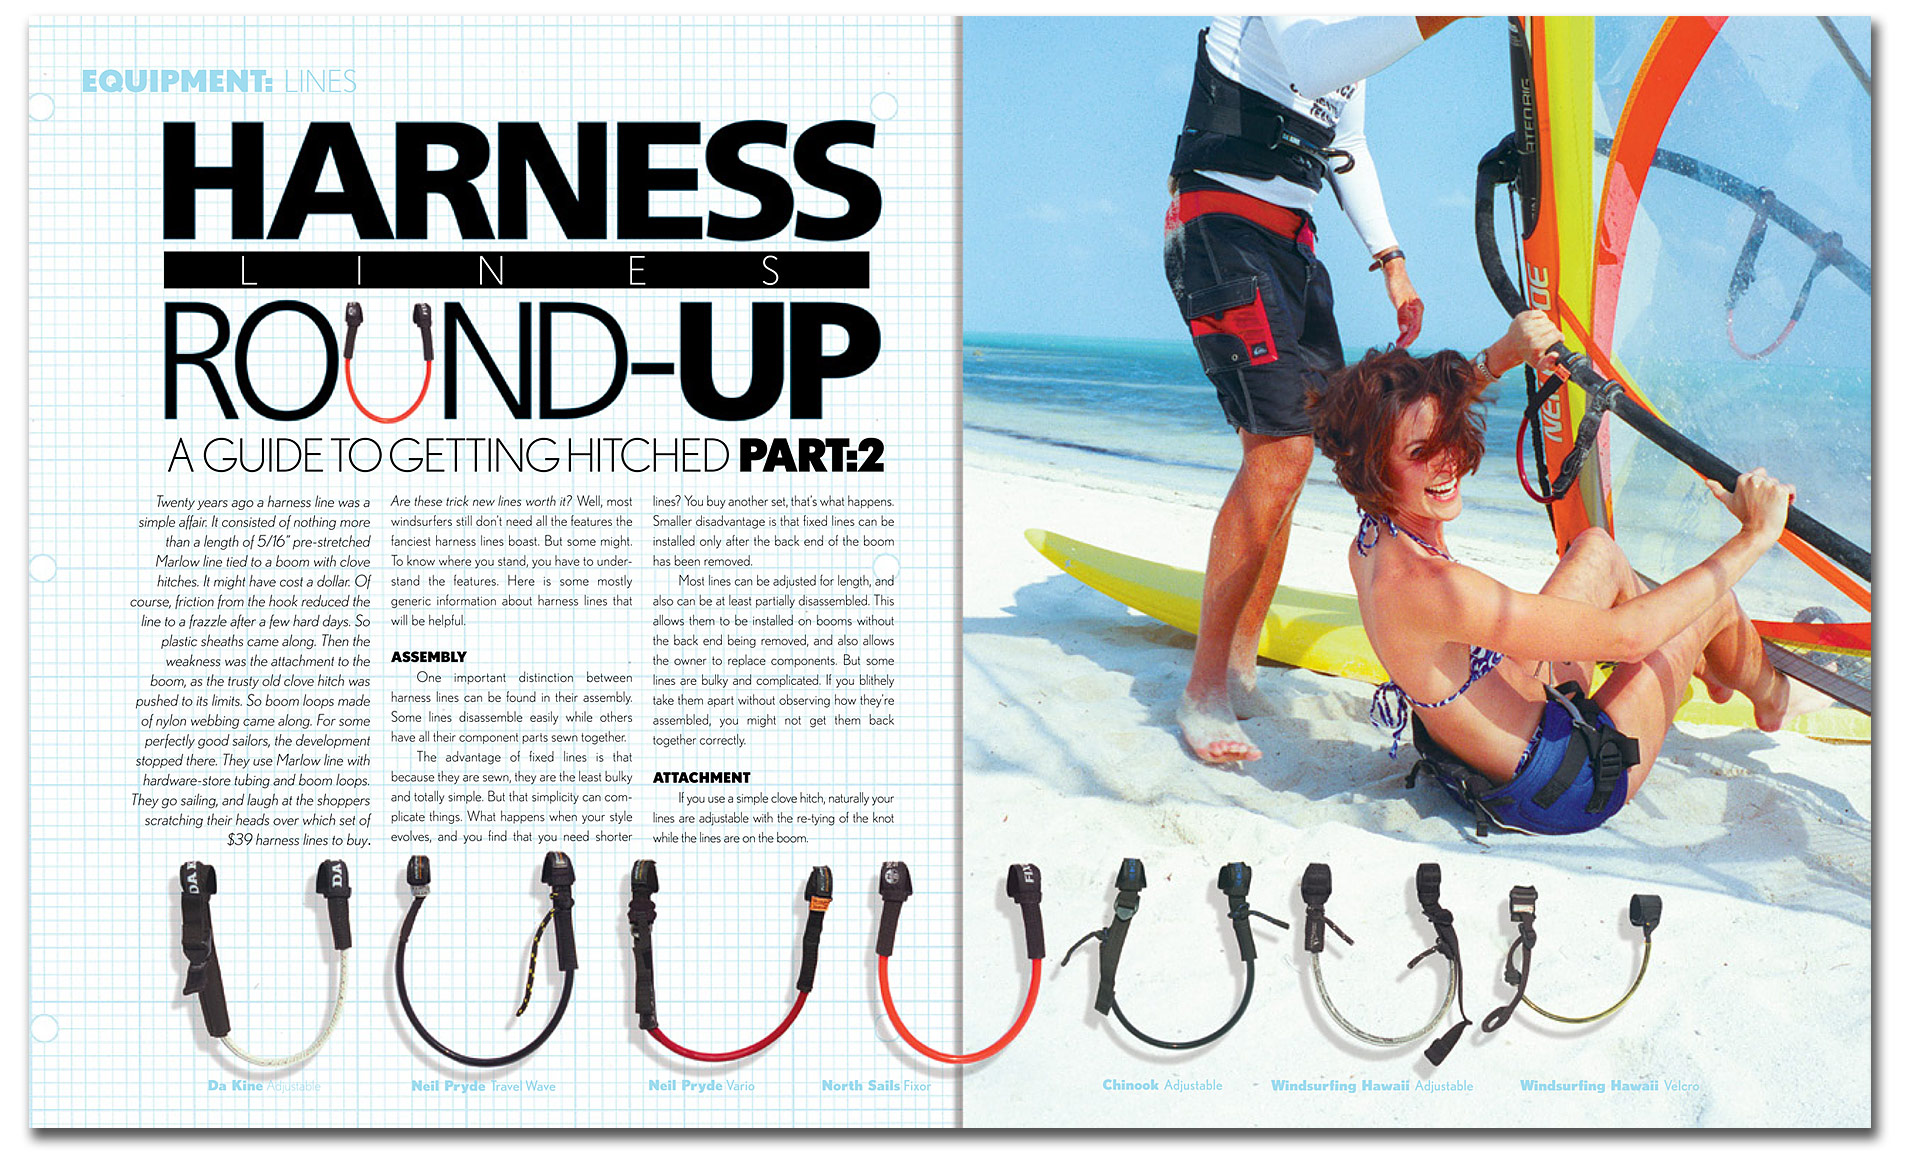
Twenty years ago a harness line was a simple affair. It consisted of nothing more than a length of 5/16” pre-stretched Marlow line tied to a boom with clove hitches. It might have cost a dollar. Of course, friction from the hook reduced the line to a frazzle after a few hard days. So plastic sheaths came along. Then the weakness was the attachment to the boom, as the trusty old clove hitch was pushed to its limits. So boom loops made of nylon webbing came along. For some perfectly good sailors, the development stopped there. They use Marlow line with hardware-store tubing and boom loops. They go sailing, and laugh at the shoppers scratching their heads over which set of $39 harness lines to buy.
Are these trick new lines worth it? Well, most windsurfers still don’t need all the features the fanciest harness lines boast. But some might. To know where you stand, you have to understand the features. Here is some mostly generic information about harness lines that will be helpful.

Assembly
One important distinction between harness lines can be found in their assembly. Some lines disassemble easily while others have all their component parts sewn together.
The advantage of fixed lines is that because they are sewn, they are the least bulky and totally simple. But that simplicity can complicate things. What happens when your style evolves, and you find that you need shorter lines? You buy another set, that’s what happens. Smaller disadvantage is that fixed lines can be installed only after the back end of the boom has been removed.
Most lines can be adjusted for length, and also can be at least partially disassembled. This allows them to be installed on booms without the back end being removed, and also allows the owner to replace components. But some lines are bulky and complicated. If you blithely take them apart without observing how they’re assembled, you might not get them back together correctly.
Advertisement
Attachment
If you use a simple clove hitch, naturally your lines are adjustable with the re-tying of the knot while the lines are on the boom.
But most harness lines now use a webbing loop which causes the weight of the sailor to cinch the loop tight onto the boom, so the lines don’t move out of position on the water. The loop may be either friction-fixed or velcro-fixed. Friction loops often slip out of place during a hard crash. It’s not uncommon for a sailor to waterstart after a catapult, let out a big sigh of relief, hook in, and find out that damn, he’s unbalanced.
The advantage of friction loops is that adjustment on-the-fly (fore and aft on the boom) is fairly easy in flat water, by unhooking and sliding the loops. The system is also good for sailors who have to move their harness lines frequently because they use the same boom with different sails, but not the same harness line position.
Velcro loops are more popular because they can be fixed on the boom more tightly. However, the flaps on velcro-fixed lines are thin and can tear, especially after hours in salt water. It’s wise to carry a spare set.
A variation on the velcro-fixed system allows for partial disassembly of a line so that it can be fastened to the boom without the boom rear end being removed. We’ve seen two versions of this approach on Neil Pryde and Da Kine lines. The Pryde system, dubbed “Travel,” relies on a simple knot and works well for the Boy Scout types among us. The Da Kine “Quick Fixed” arrangement is a refinement (more compact and durable) of a system brought to us several years ago by Windsurfing Hawaii but no longer offered by that company.

Stiff or Floppy?
Harness lines can be stiff or floppy, mostly depending on the method of attachment. Fixed lines with no exposed rope will be stiff, while exposed rope between the boom-loop and plastic sheathing will allow the lines to dangle under the boom. Many pros like floppy lines because they can swing them into the harness hook—actually, it’s more like a flick. Theoretically, of course, the hook-in movement should be made with your pelvis, not the boom. But if the lines swing freely, and you move your pelvis to meet them halfway, it’s a very small twitch of the boom, and
virtually meaningless to momentum.
There are pros and cons to floppy lines. One pro is that you can unhook quickly in a hole, because the line plops right out. One con is that you can unhook unintentionally in chop, because the line plops right out, as your body gets jolted around. Of course, a perfect sailor in a perfect world would keep a tight stance and harness-line tension regardless of chop, but, hey—we imperfect sailors live in the real world. One resolution of this flipsided technical problem might be to use floppy lines on your big boom for light wind, stiff lines on your short boom for high winds.
The stiffness of the line itself is not really a problem, as the plastic tubing around today’s lines takes care of that. But in the old days, you might remember, unsheathed lines squirmed and blew every which way in high winds and chop, and to hook-in, sometimes you had to use your teeth to catch the dancing line.
Durability
It’s not much of an issue. The plastic will wear slower with roller-type harness reactor hooks than with aluminum hooks, which are most common. Stainless hooks fall somewhere in between, resistance-wise. Worn plastic tubing is the least of a sailor’s worries.
Adjustability
The range of adjustment necessary in a harness line varies. Sailors with long arms and racers using seat harnesses might need as much as six inches. Keep in mind, however, that six inches of overall length adjustment actually yields only about three inches in distance from the boom.
Fixed-length lines can’t be adjusted, obviously, although sailors have been known to tie a knot in such a line to shorten it. But that’s pretty crude and, experience tells us, a knot in a plastic line eats up no less than four inches. So if you’re borrowing a gorilla’s rig for a quick ride, and need to adjust a 28-inch line down to 24, go ahead and knot away.
Lines can be adjusted on-the-beach and on-the-fly. The former is a line that you can adjust in length by cutting the sheath shorter and re-knotting the rope. The latter is a line that you can adjust in length while sailing, as well as on-the-beach, of course. These lines widely differ in complexity, ease of use and range of adjustment.
Advertisement
Most on-the-fly lines use ladder-lock buckles and webbing as the adjustment mechanism. A hard tug on the end of the webbing will shorten the line, while lifting the lower end of the buckle and pulling on the line (pulling with the harness hook while sailing) lengthens it. Some lines work smoothly, while others don’t. Do comparison shopping, here. Before you buy an on-the-fly adjustable line, see how smoothly it moves.
A new innovation for on-the-fly lines uses cam-lock buckles, much like the buckles used to tension some sail battens. These are easier to operate than ladder-lock buckles, but were thought prone to slipping. For the Islamorada clinic, Da Kine sent us a set of their new Reactive harness lines with the aluminum cam-lock buckle adjustor, and they worked perfectly.
Have something to add to this story? Share it in the comments.


